Originally I tried achieving this using SIP, and failed miserably at reflashing the phone (cisco
7960) to SIP firmware, I feel like this is partially due to the varying quality of information
(and available firmwares) for reflashing the phones to SIP.
I then came across chan_sccp (and sccp_manager), after a couple hours of
experimenting, and testing it, I was able to get my Cisco 7960 to register with FreePBX, using
SCCP, and was able to make and receive calls after setting up a trunk, and routes within
FreePBX.
The steps below assume that you installed FreePBX using the Distro, however, other installation
methods should work the same (untested though).
Step 1. Configuring a DHCP Server
For the Cisco phones to find their configuration files that get generated by
sccp_manager, you need to setup option 66 and 150 on your DHCP server so the cisco
phone can find the TFTP server. In our case, the TFTP server was built into the FreePBX
Distribution file, so we will configure the DHCP server to provide the IP address of the FreePBX
machine.
My DHCP server is running as a home assistant addon, which i’ve edited to provide custom options,
you can find my edited version of the home assistant DHCP addon here.
If you have a regular installation of a DHCP server (which I suspect most people will), then you
can edit the /etc/dhcp/dhcpd.conf file, and add the following:
option cisco-tftp code 150 = array of ip-address;
subnet xxx.xxx.xxx.xxx netmask xxx.xxx.xxx.xxx {
    # your other options
    option cisco-tftp 192.168.1.2;
    next-server 192.168.1.2;
}
Alternatively, if you didn’t want to setup a permanent DHCP server, you can use something like TFTPD64, which runs on Windows and provides a
TFTP server, and DHCP server built into one application.
You might have to enable the TFTP server that is built in with FreePBX, in this case you will
want to edit the /etc/xinetd.d/tftpd file, and change the
disable = yes to disable = no and then reboot your machine (or restart
the xinetd service)
2. Installing chan_sccp.
We need to install a couple of packages before continuing with the chan_sccp installation.
After the dependencies have installed, you can now move onto the installation of chan_sccp, the
commands for that are:
cd /usr/src
git clone https://github.com/chan-sccp/chan-sccp
cd chan-sccp

./configure --enable-conference --enable-advanced-functions --enable-distributed-devicestate --enable-video
make -j2 #remove the -j2 option if you dont want to use two cores
make install
Now that we have downloaded, built and installed the module, we just need to enable it. FreePBX
makes this easy with their interface. Start by loading your FreePBX interface, and then go
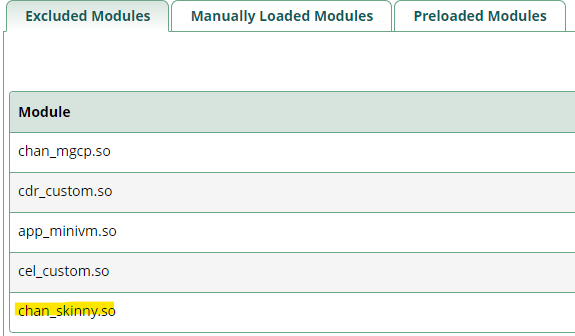
Admin -> Asterisk Modules, and then in the “Excluded Modules” tab, add
chan_skinny.so, as shown here:
Image 1 Modules
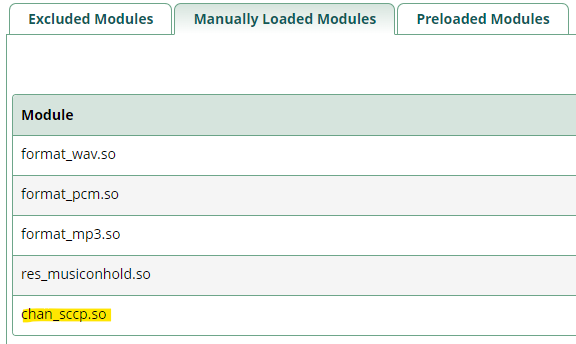
and then in the “Manually Loaded Modules” tab, add the module that we just installed
chan_sccp.so, shown below:
Manually Loaded Modules
3. Installing sccp_manager
Whilst you could configure the phones manually, SCCP Manager makes it infinitely easier to setup
extensions, and create configurations for phones all in one place.
Warning
The SCCP Manager github page says that you should copy the phone settings templates to
the directory /tftpboot/templates using the command
cp /usr/src/chan-sccp/conf/tftp/*.xml /tftpboot/templates/, however, when I
did this process, it worked fine without doing this. YMMV.
Using FreePBX to install sccp_manager is surprisingly easy, you will want to go to
Admin -> Module Admin on FreePBX, and then click “Upload Modules”, select
“Download (from web)” in the download type, and then enter the Github repository URL:
https://github.com/chan-sccp/sccp_manager/archive/refs/heads/Legacy.zip, and begin
the download.
After the download has finished, you will have to install the module, so from the top of the
“Upload Modules” page, click “Manage local modules”, and then scroll down to the section titled
“SCCP Connectivity”.
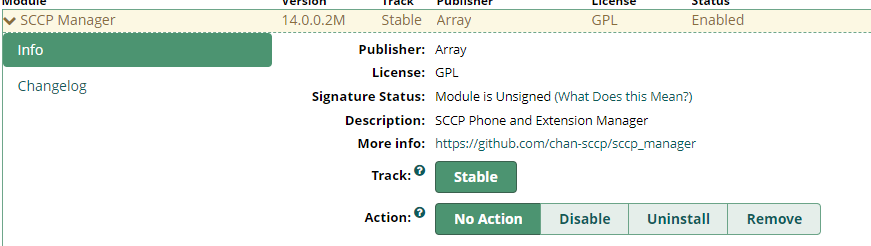
Expand the dropdown, and at the bottom of the dropdown, click the “Install” button. scroll to the
bottom of the page, and click “Process”. After waiting a few minutes, it should successfully
install, at which point it’ll look like this in the Module Admin, and all you will have to do is
“Apply Config”.
Installing Extension
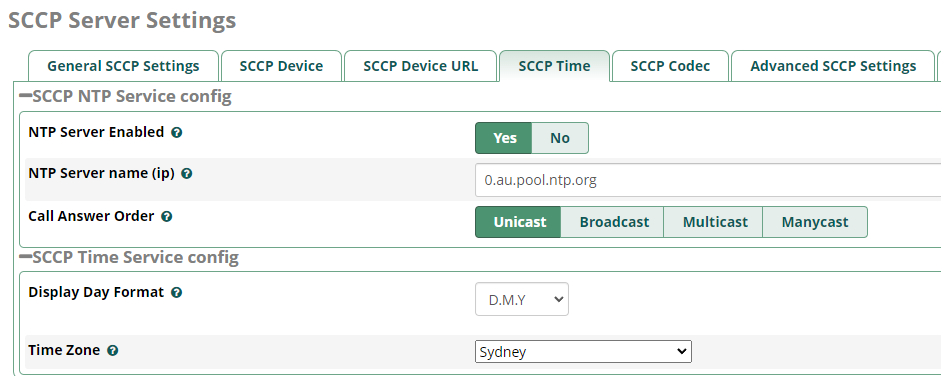
After installation, you should also configure the SCCP server to use the correct date and time.
To do this, select “SCCP Connectivity -> Server Config”, and then click the “SCCP Time” tab,
and configure the settings for the timezone. My time configuration looks like this:
Setting SCCP Manager Timezones
4. Registering a Cisco 79xx Phone
We are on the final stretch of all the configuration steps. This guide assumes that you are using
a 79xx phone, which are had for relatively cheap on eBay and such (~$25 AUD). SCCP Manager
claims that it can handle the following models: 7906, 7910, 7911, 7940, 7960. It should work
with other models, but that is untested, and not covered by this post.
Open the SCCP Manager dashboard by selecting “SCCP Connectivity -> Phones Manager” in your top
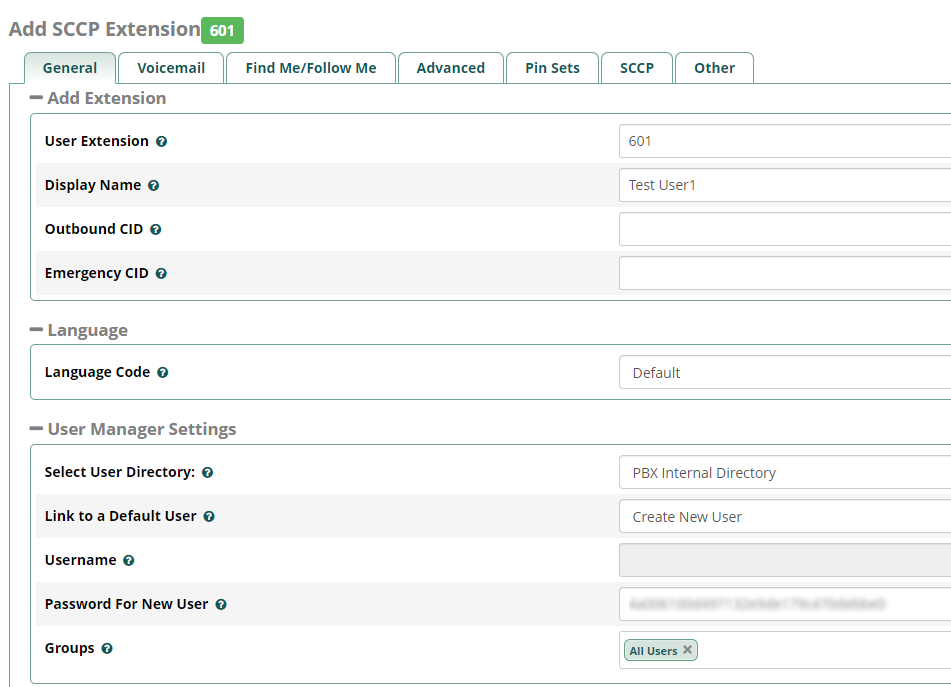
menu bar. You’ll first want to create an extension, by clicking the “Add Extension” button.
You’ll be presented with a page asking for various input, such as extension, display names etc.
Enter the details that you require for the extension, as an example, this is what my test
extension configuration looks like:
Configuring Extension
After creating the extension, you will want to navigate back to the “SCCP Connectivity ->
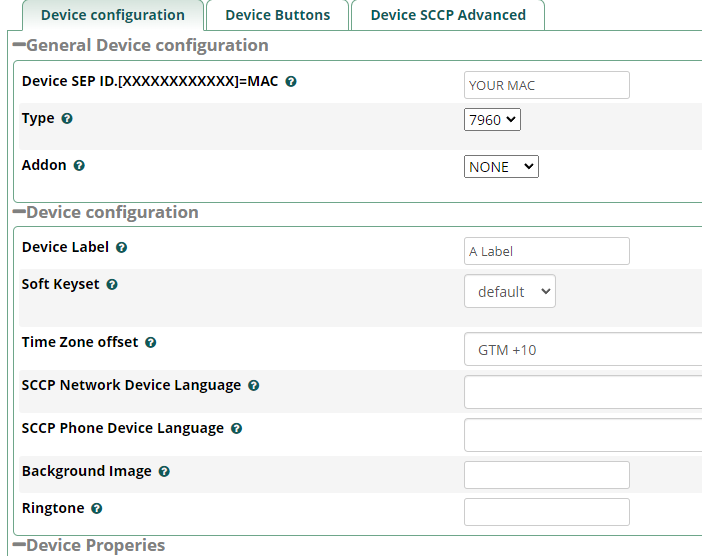
Phones Manager” page, and then click the “SCCP Phone” button, and click “Add Device Phone”.
For the “General Device Configuration” section, you will want to enter the details that apply for
the physical phone you’re creating a configuration for. The device MAC Address (SEP ID) can be
found on the back of the phone, typically as a small sticker at the bottom center.
In the device configuration section, you can enter the details that apply to your situation, in
this case, I just entered a basic device label, and set the time zone offset to the offset of my
timezone (GMT +10).
The “Device Configuration” tab should look something like this after you are finished.
Configuring Device
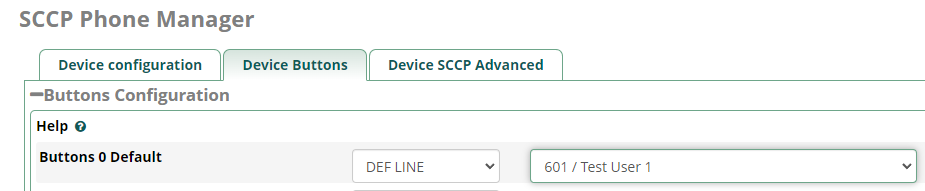
Before deplying the configuration to the phone, we just need to assign an extension to the phone,
so click on the “Device Buttons” tab at the top, and for “Buttons 0 Default” select the
extension we made previously.
Setting main extension
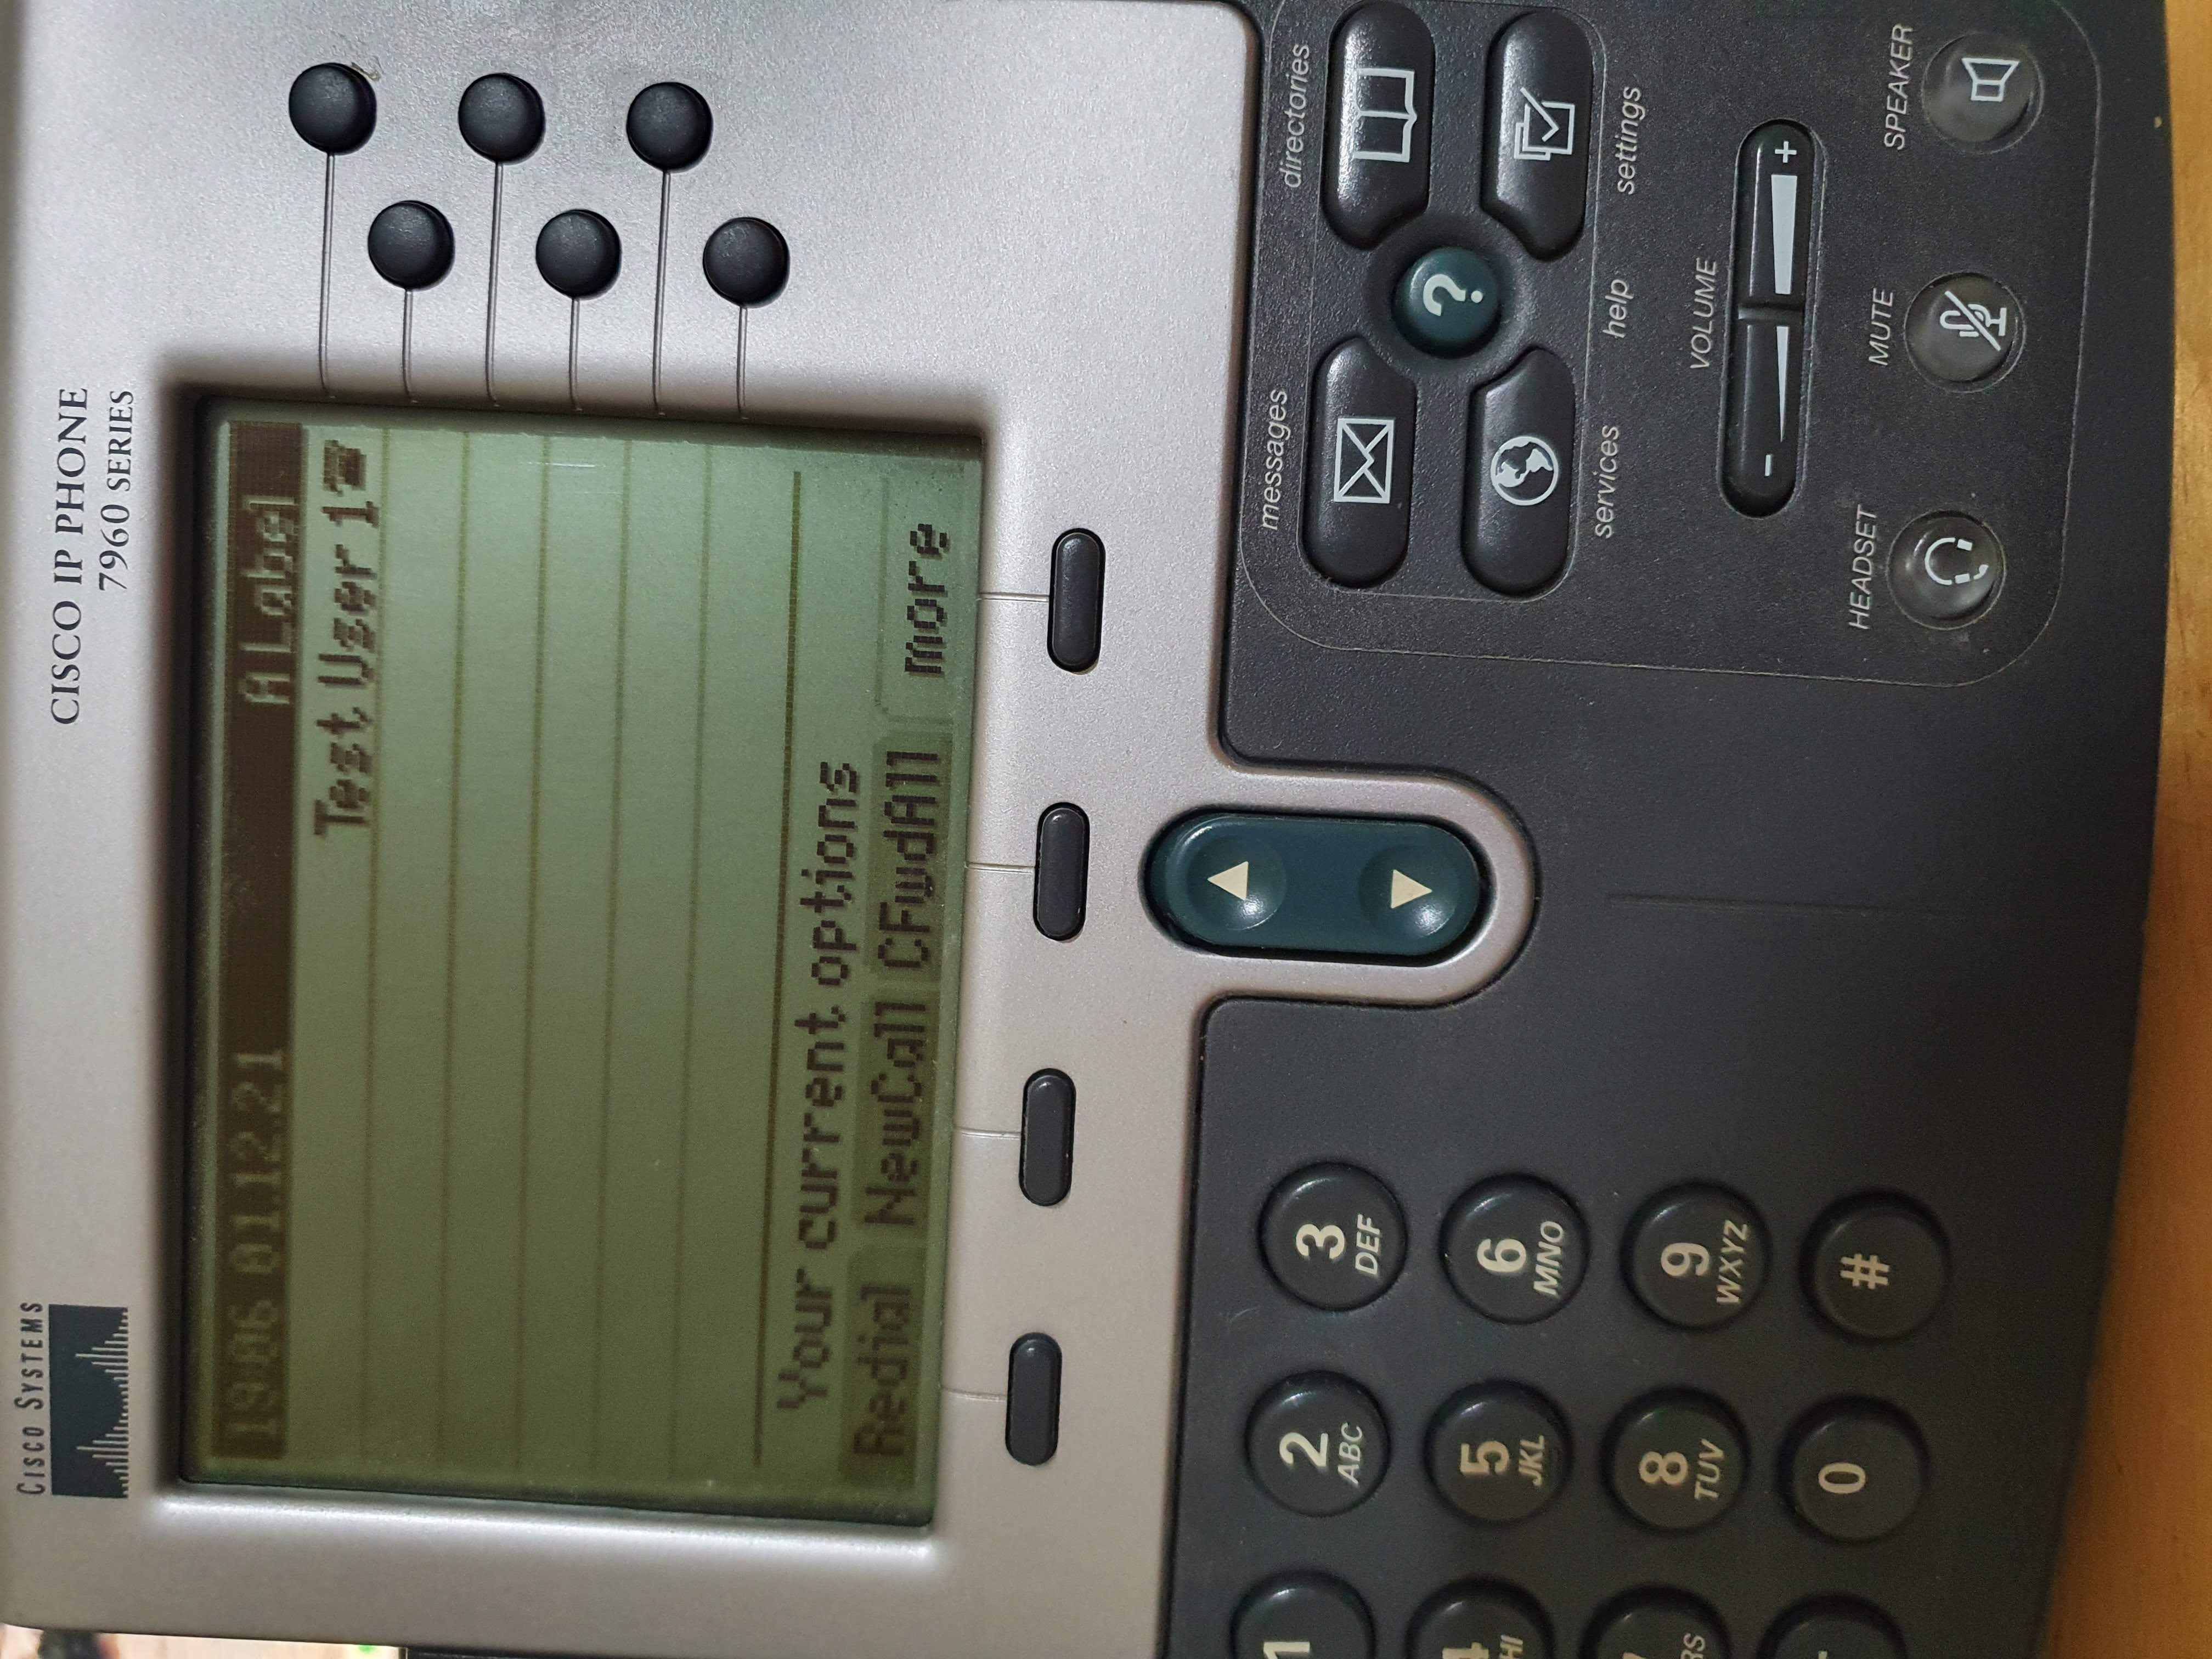
All that is left in this step is to plug the phone in, and wait for it to self configure. Be
prepared to wait, the first time I configured a phone, it took a couple minutes for it to
complete the process.
Your phone screen should look similar to this if the configuration has been successful:
Phone Configured
If you have setup a trunk, and some inbound and outbound routes, you should be able to place a
test call, or if you haven’t setup that yet, create another extension (PJSIP), and use a SIP
Phone on your computer.