- Username
- Secret
- SIP Server
Configuring SIPTalk with FreePBX, and setting up Australian Outbound Routes
Jack Scott · 2021-12-01This post is going to cover how to setup a trunk in FreePBX to use SIPTalk VOIP, an Australian VOIP Provider. The article will also go over some general outbound routes to setup for Australian Phone numbers etc. Credit to Whirlpool AU for providing a starting point when I initially began configuring this. The configuration provided there didn’t work for me, hence documenting it here.
Whilst this article covers SIPTalk for the Trunk, instructions should be fairly similar for other VOIP providers.
Step 1. Configuring the Trunk
To begin setting up a trunk, go to Connectivity -> Trunks, and create a new PJSIP
Trunk (Add Trunk -> Add SIP (chan_pjsip) Trunk). On the page that opens, you
will have three tabs, General, Dialed Number Manipulation Rules, and pjsip Settings. For the
moment, the two we are concerned with are General and pjsip Settings.
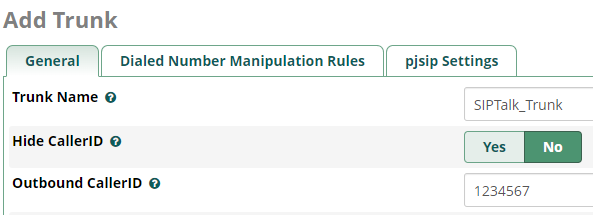
In the general tab, enter a name for the trunk, and then in the “Outbound CallerID” enter your SIPTalk extension ID, which typically is seven digits. It should look something like this:
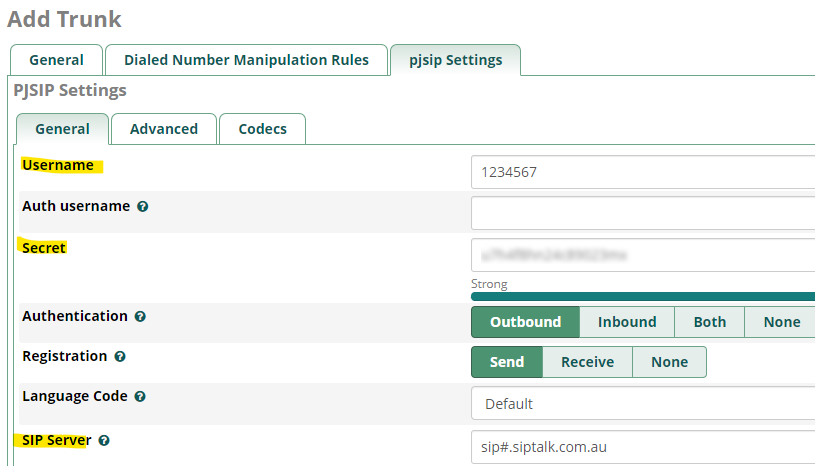
Next, moving over to the “pjsip Settings” tab, and then selecting the “General” sub-tab, there are three fields you will want to fill out.
For the username, you will enter your SIPTalk Extension ID. To find the secret, and SIP Server to use, you will have to log into your SIPTalk portal, and then navigate to the management page for your extension and then scroll down to the “Configuration Management” section.
The SIP Server will be in the format of sip#.siptalk.com.au where the #
is a number ranging from 1-9, and the secret will have to be generated. Copy both of these into
the appropriate fields in FreePBX, it should look similar to this:
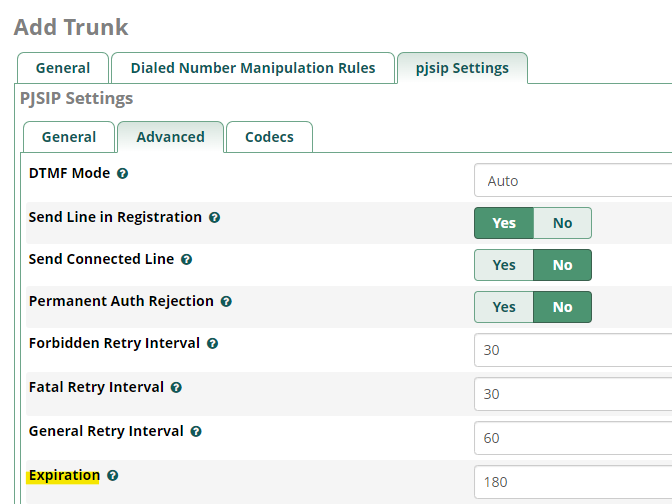
The last thing you will need to change is the registration expiration time. By default FreePBX sets this to 3600 seconds (60 mins), SIPTalk requires this to be 180 seconds (3 minutes). You will find this option on the “Advanced” subtab of “pjsip Settings”, shown below:
This is the basic configuration for your trunk complete, if you save the changes you made, you should see the trunk come online in FreePBX, and you should also see the registration in the SIPTalk dashboard.
Step 2. Configuring the Outbound Routes
To begin configuring Outbound Routes in FreePBX, navigate to
Connectivity -> Outbound Routes. On the page displayed, press the “Add Outbound
Route” button to begin configuring new routes.
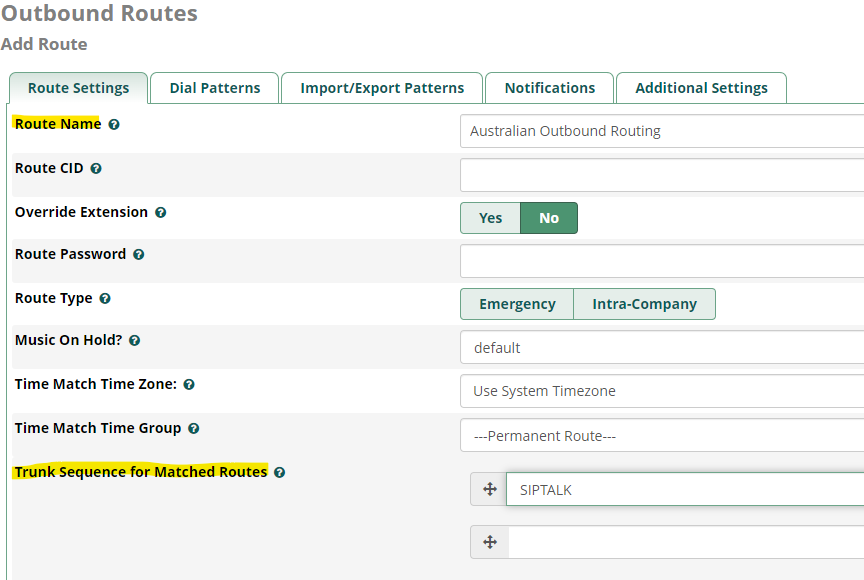
You will now have a configuration menu open, in the “Route Settings” tab, at minimum you will want to enter a name (can be anything), and a trunk to use. In this case we can use the trunk we setup before.
You can use the other options there, but for a basic configuration this will do. Moving over to the “Dial Patterns” tab , there are five patterns that we can use for Australian phones, those are:
| Pattern | Description |
|---|---|
| 0. | Used for matching phone numbers, emergency numbers etc |
| 1300. | Used for matching 1300 numbers |
| 13XXXX | Used for matching 13 numbers |
| 1800. | Used for matching 1800 numbers |
| XXXXXXXX | Used for matching 8 digit landlines |

After this, your basic outbound routes have been configured. I have also uploaded an export of these patterns, so you can just download the CSV file and import it directly. File Download